10 Functional Ideas for Repurposed Shutters
Adding repurposed shutters into your decor is a fun way to incorporate history into your home. Whether you are using shutters from your own home or shutters you picked up from the local flea market, your finished project will be something truly awe-inspiring.
Think about all the different shutter types and how each one tells a story of a historic past. The chippy details and marks along each corner all speak to a story that only that specific shutter can tell. It’s those imperfections that build the foundation for a beautiful repurposed piece. These are treasures worth hunting for and can be morphed and shaped into a final project that reflects you and becomes not only an addition to your home but a part of your family.
Decorating with old windows and shutters is the chameleon of decor. They can take on many different forms and the design possibilities are truly endless. We’ve compiled a list of 10 ways you can use repurposed shutters to add functionality and style to your home. These are a mix of really easy uses and some more advanced uses. You can’t go wrong with any of them and no matter how you decide to use your shutters they’re sure to add charm to your home.
1. Shutter Bathroom Shelving
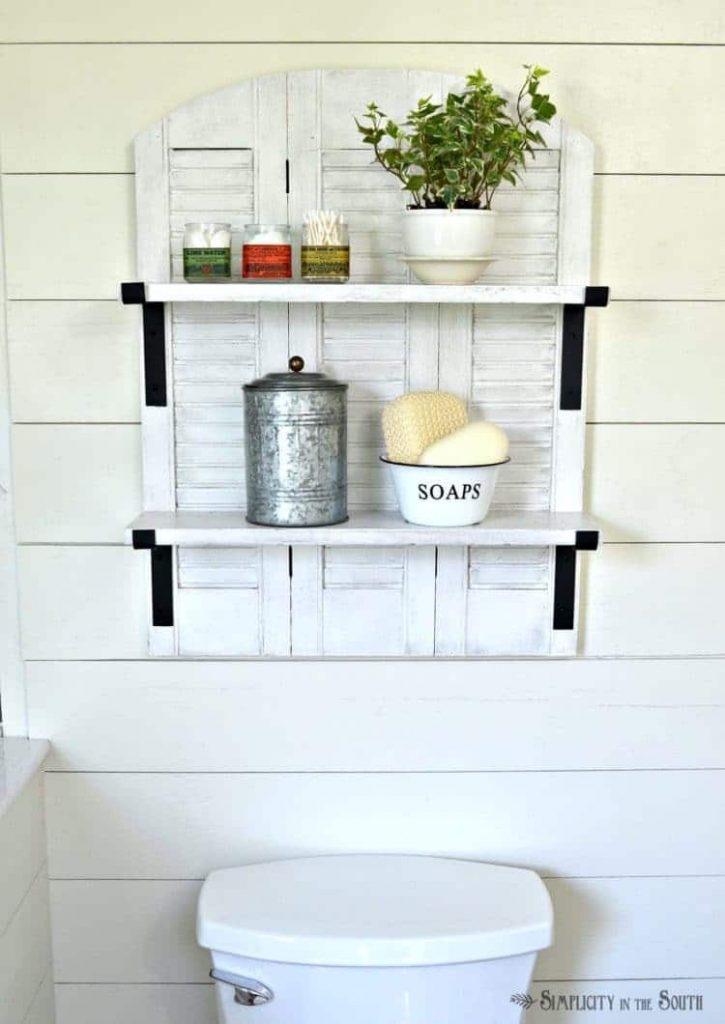
Bathroom shelving is a must for most of us. You can never have enough storage in this space and usually, we gravitate towards shelving that’s hidden. We want more storage space but don’t always think about the beauty of storage that’s on display. Even adding just your standard floating shelving doesn’t add much dimension and texture. Although both hidden and floating shelving are great options, they lack the character and charm that we all crave in our home.
If you already have some wooden shutters picked out, then the rest is easy! Decide whether you want to refinish your shutters to match the shelving you are attaching or if you prefer a two-toned look. Once you’ve decided on your color scheme, it’s time to pick out whether or not you want some brackets attached to your shelving. We love the hardware look contrasted with the wood. The great thing about hardware is it’s a fairly cheap addition to your finished project. Combine all these pieces together and you have a beautiful functioning shelf that you can use in your bathroom space. See the photo below for some inspiration.
2. Repurposed Shutter Photo Display
If you don’t have the luxury of having shutters on hand, you can always pick up some beautiful old shutters for a low price at your local flea markets or antique store. Usually, you can discover so many unexpected shutter options at these places. It’s always a treasure hunt worth taking. You might even be directed into a completely different direction than you thought!
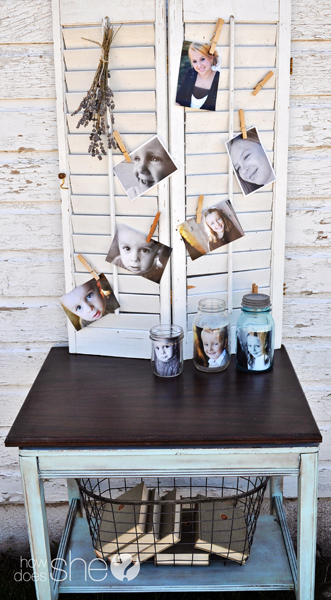
Once you find your perfect shutter, another great option is to turn them into a photo display. This is a very simple homemade shutters DIY project that anyone can do. The great thing about a photo display made with shutters is you can easily update the photos. All you need are the shutters you’ve chosen, some clothespins, and twine.
If you’d like to repurpose a window shutter into a photo display piece, you can just clean it and stain it or, if you want to preserve its character, leave it as it is. Put it on a wall or lean it up against an entryway table or mantel, and attach your photos with your mini clothespins. That’s it!
3. Shutter Wall Display
If you’ve gotten to the point where you’ve refinished your shutters and you are looking to give them some more functionality, then creating a wall display piece is the perfect option. You can easily build a wall display into anything you want. Finding the perfect design is left to your imagination and you can get as creative as you want!
Looking for ideas? One option is to add some mason jars to your shutter and fill them with fresh or faux florals. This is a fun way to bring the beauty of the outdoors inside while adding some pops of color. You could also try adding some mini wreaths for some texture and dimension. Plus you can switch out your wreaths or wreath with the season! Think holly or evergreen for Christmas!
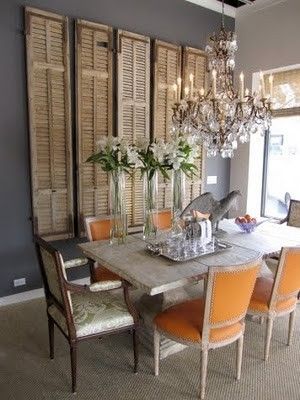
You can also keep it extra simple and just add a bunch of shutters to your empty wall space as the perfect display. It will fill out your wall effortlessly. Check out the photo below for some additional inspiration.
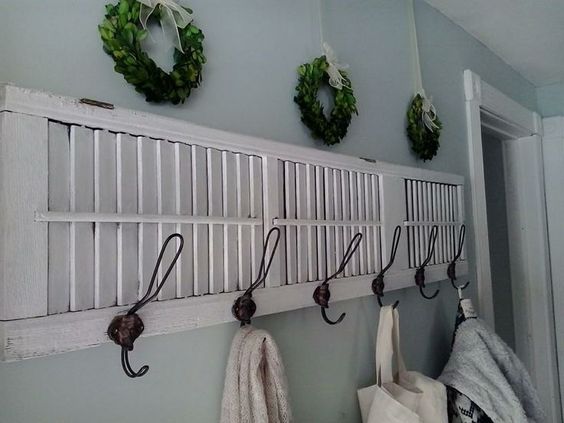
4. Shutter Shelf with Hooks
We’ve all seen them before. Those cookie cutter pieces that you can tell aren’t exactly authentic. We love them and they are convenient but if you are able to create a real shutter shelf with hooks then we say go for it!
For this project, you may have to cut your shutter down a bit depending on its length and the dimensions of the wall you intend to hang it on. Once you’ve cut your shutter down to the desired length, it’s time to paint or stain it! You can’t go wrong with just staining it because it keeps the original character and details alive. Paint vs stain just depends on the look you are going for. If you prefer a more modern vibe then painting is for you. Pick out your hooks and maybe even a wood shelf at your local hardware store and you are ready to put everything together.
5. Repurposed Shutters Kitchen Island
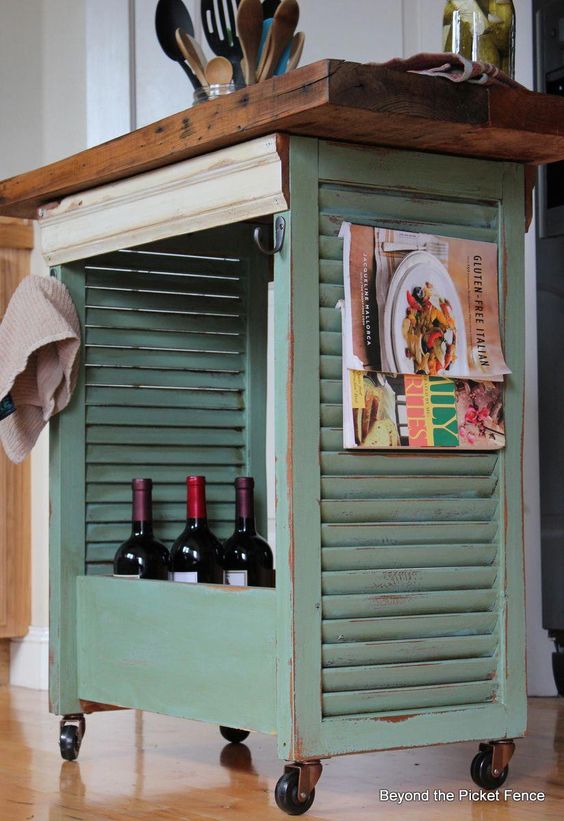
A pair of repurposed shutters and a discarded drawer can go a long way! You can use these things to create a kitchen island that won’t go unnoticed. This is a project you can get super creative with and you’ll be getting compliments from everyone!
For a simple and smaller kitchen island, you can easily put your repurposed shutters on each side of your island cart. Use an old drawer from your kitchen. You could also purchase a pre-designed drawer or build one yourself. Add the drawer to the bottom and make sure that it’s big enough to be the foundation for how big your island will be. Pick out your countertop (butcher block, wooden top, actual stone!) and combine them all together! You can get some helpful tips by heading to HomeTalk.
6. Window Shutter Coffee Table
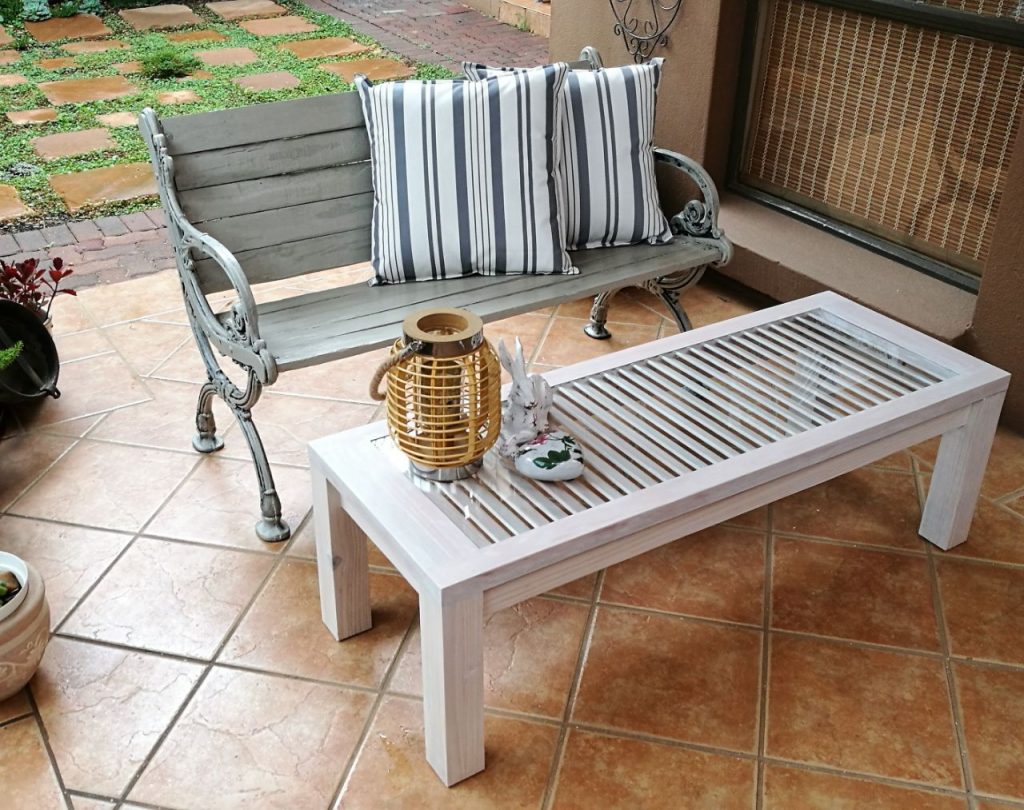
This has to be one of our favorite ideas! It’s such a unique and functional way to utilize your repurposed shutters. Assuming your dimension are suitable, you can combine your pair of shutters to create a beautiful coffee table for your living room or family room. For the base, you can buy a cheap coffee table, use your old one, or build a new one. The options for how you want to create your base are endless. We’ve even seen a base made out of crates done before!
If a coffee table isn’t your thing or what you need, then opt for building a console table instead. This can be done with one shutter instead of the pair and the outcome is incredible. We know building your own console table can be a daunting task. That’s why these helpful tips on how to build your very own console table from HGTV are perfect for getting started.
7. Repurposed Shutter Window Box
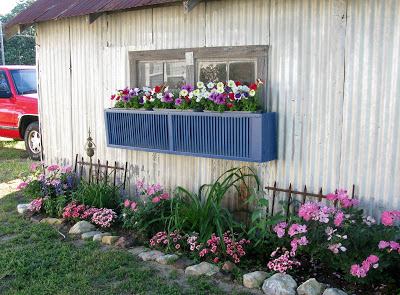
Here’s another really cool idea! If you have some repurposed shutters and aren’t exactly sure what to do with them, why not turn them into a window box planter? Depending on the dimensions of your shutter you can easily transform your indoor or outdoor space with a DIY window box. If you are building an outdoor window box, you may need two shutters to get the look depending on the size of your window. In contrast, if you build your box for indoors on your kitchen window sill, then you most likely will only need one. It all depends on your space so always be sure to measure before you start any project.
Fill your window box with seasonal flowers and in the winter fill them with seasonal potted plants. For example, poinsettias would be a great option for your indoor window box over the holidays!
8. Window Shutter Table Runner
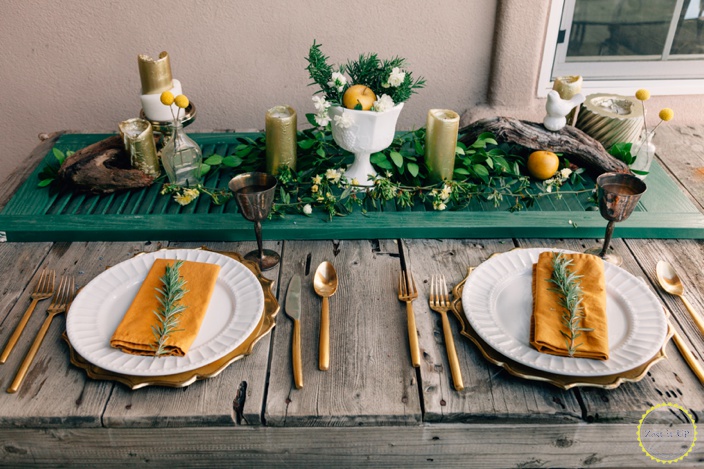
So far we have covered some really awesome projects, but we have yet to tackle one for the dining room. Well, the good news is, we have one! It’s probably hands down the most simple way to use your repurposed shutter and a great way to define and create an eye-catching centerpiece for your dining table. Make your shutter a table runner in the center of your dining table! That’s it, and it’s as simple as adding some additional items on top and around your shutter to create a charming look.
You could easily add in some candles, pedestals for height and a garland for a touch of greenery. Adding some fresh fruits to the mix could give you that pop of color you need for any occasion.

9. Shutter Jewelry Organizer
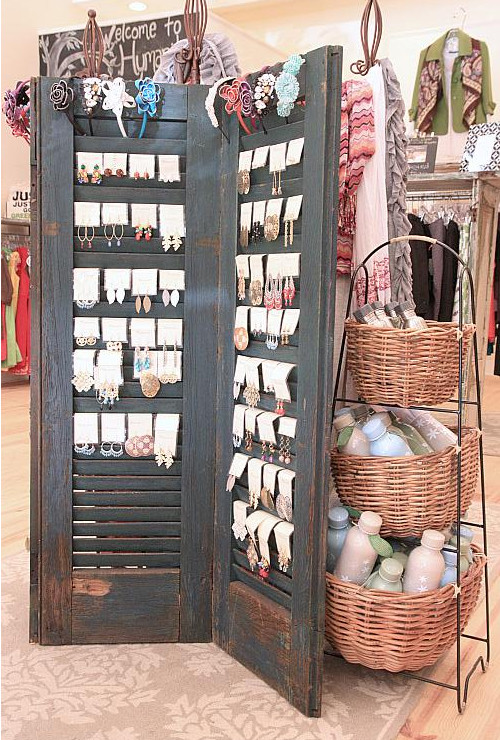
Jewelry is the one thing that seems to always get cluttered and it’s easy to not keep it organized. There aren’t a lot of options out there that truly help. One of the most frustrating things about jewelry organizers as well is that they rarely ever look pretty while doing it so we have to keep them hidden. Wouldn’t it be nice to keep your jewelry on display and in a spot that you can easily grab it and go? Yes, we agree!
Turning your repurposed shutter into a functional jewelry organizer is a great option and it is super easy. First, add a couple hooks to each side to hang your necklaces from. You can make these small metal hooks or colorful festive hooks depending on the look you are going for. Once you have your hooks that’s it! Hang necklaces and bracelets from the hooks and earrings go right on the shutter. See the below picture for inspiration.
10. Repurposed Shutter Headboard
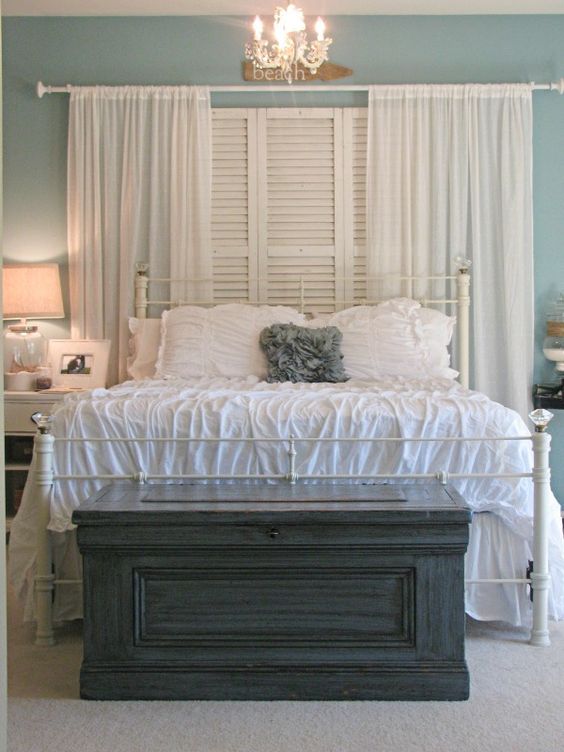
The transition from shutter to a headboard is a fairly easy one and a great option for any bed size. Depending on your bed size and shutter size you could need two to six shutters for your project. Always be sure to check the dimensions of your bed before deciding how many shutters you will need. Repurposed shutters make a grand statement in the bedroom and this faux headboard is a cheaper alternative to buying a bedframe.
You can get even more creative with it by attaching some sconces to your headboard or even adding shelving at the top to hold or display items such as family photos, signage, books and so much more.
With repurposed shutters, you really can’t go wrong with how you decide to use them. Hopefully, we’ve provided you with some helpful tips and inspiration on how you can create a look that won’t break the bank and will continue to add historic charm to your home for years to come.